2012/10/17

Going Eco With BlueAvocado

Hi guys

So the world is constantly changing and sometimes it's for the good, sometimes for the worse. Recently I've tried to live more ecofriendly and it's always cool to find new things or projects that have the same in mind.

There's certain things that I hope a lot of you are already doing consciously (and if not, start now). They are easy, don't cost and actually can do some change. For example: turning off lights in unused rooms, wash your clothes at 30°C, not letting water run while brushing your teeth and using re-usable bags. Which brings me to what I actually wanted to show you today.

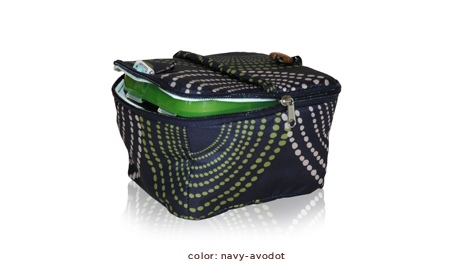
Maybe some of you have come here through LaurenConrad.com and already know about this, other may have already heard or seen it somewhere else. I'm talking about BlueAvocado!

Here is a little exerpt from their home page:

Welcome to BlueAvocado, where an eco—conscious and reusable lifestyle means both doing good and looking good.

Made from Repreve® certified, recycled polyester fabric, our products give new life to recycled plastic bottles and feature an impact label to help you map your "green journey."


Isn't that great?! They have so many cute and adorable and chic products and all are eco-friendly and doing some good. Here are a few of my favourites.


So maybe some of you think about getting something? The lunch boxe could easy be used as a picnic box on a romantic date? Or wouldn't it be much cooler to pack for a trip when you know you could put your things into the cute travel kit?

Anyways, I absolutely love the project and their products and I hope I could inspire some of you to think and try to live a bit more eco-friendly. As we just saw, it's super chic.

xoxo, the beauty

2012/03/16

Spring is coming.

As the beauty already stated, warm weather seems to start settling down here in Zurich. Hopefully! Sick of the cold and the sneezing and freezing.
I already promenaded down to the lake, ate lunch outside and just chilled on the balcony, 'cause i don't wanna miss any minute of sunshine :)
But what would spring be without an appropriate spring wardrobe?
So i, too, made a little set. As you can see, I'm really into blue and green lately. And i lohove the big bangles! Also the three-finger ring has really caught my eye. If only it wasn't so expensive..
However, it's no big piece of art, just a time-beater :)

Spring is coming.

Hope y'all are enjoying the weather too! :)

xoxo, the Nerd.

2012/03/01

push it real good - with converse lavender

hi guys

spring is right around the corner and the days are starting to get warmer and longer. it's about time to put those winter boots and heavy coats away and take out your spring clothes.

for that occasion i put together a set of my favourite shoes with a matching outfit. i looove converse and i wish i had them in every colour available. they look cute with a mini skirt and cool with shorts and are comfy as heaven :)

so here it is:


i hope you like the outfit as much as i do :)

xoxo, the beauty

2012/02/29

red - gold - black striped manicure

hi peeps, today is a new manicure day. i felt like doing something with stripes as i'm a huge stripes addict (like shirts, shoes etc!)

ok so first to what you'll ned for this manicure:
- 3 colours of nail polish of your choice - i used: essence stamp me black!, essence fateful desire and catrice in the bronx
- top and base coat
- sticky tape
- scissors


ok so start with a coat of base coat and then add your first colour all over the nail. i started with the red one. i didn't take a picture because i was a bit tired and didn't remember.

ok then take your tape and cut little stripes, don't make them too big though or they won't stick well. here i'd like to tell you about a little trick i learned on my countless hours on the net on other peoples nail blogs. take the tape and stick it on your palm. take it off and on again for a while until the hardcore stickiness is gone. like that you won't rip off the underlying colour. apply them like this:


then take your second colour and paint the nail again. remember that when taking a darker colour like black, think about what goes on top of it.


leave the tape for about 5 minutes. i had to find out the hard way that by removing it too early you'll have smudges and it will look like the cheese when biting a piece of pizza...streeeeetching. it'll look like this:


now take the tape again and remember that you have to cover everything that you'll want to show up after applying the third colour. so if you want a golden - red - black mix, on my index finger, i would cover everything besides the uppermost part of my nail. like this:


if you want the newest colour in the middle, red - gold - black, cover everything else, like this:


after letting it dry and taking everything away it looks like this:


now to some practical stuff in the end. i added a layer of top coat after every colour, because i found it helped prevent removing some of the underlying colour when you remove the tape.

aaand this mani is perfect if you have one day where you feel like one colour and on the second or third day the tips of your nails chipped away a bit, cause you'll just cover that with another colour :) perfect, right?

so go try it out and show us your best pictures or comment as we would love to hear from you!

xoxo, the beauty

2012/02/28

Owl always love you!

Good morning nail-art-addicts all over the world!

Today i want to show you one of my favorite tutorials.
I'm totally into Owls (yeah, little hipster thing going on there, huh?), seriously, i always loved them. So i thought, why not put them on my nails? And i just tried and this is how it turned out.

You'll need:
>1 ground color
>1 owl color
>1 belly color
>white polish
>black polish
>orange polish
>top- &basecoat
>a match


This tutorial is for any length of nails, it's just a little harder on short ones.
After applying your basecoat and letting it dry, you can start applying the color you chose for the background. I chose a nude background, but that's just for this tutorial, i'll show you some variances at the end.
After your base color dried, paint a half square on your nails and add litle batmanish ears. You can do it on one nail, as i did here (i did the other nails with a French tip in the same color), or put the owls on all of your nails.


After it dried, take the color you chose for the belly (it has to be a contrasting color, or it wont look as good) and paint a little half circle at the top of your nail, like this:


As you can see, nobody's perfect, so dont care for nailpolish that got on your hands. You can simply remove it with a nail-polish remover pen (i have the essence one, it's really good) in the end.
Then take your match and the white polish. Slightly dunk the match into the polish bottle and then add two little white dots above the half circle. This will be the eyes. Additionally, you can put dots on the belly too. Take another match and do it the same way as the eyes. But don't apply too much pressure!


Let the dots dry. After that, ake the orange nail polish and draw little feet and a beak on the belly. I do that with the brush of the polish, but if you're not too secure about your drawing skills, you can use a nail art pen!


Once again, let it dry. You have to be really careful, cause you don't want the whole thing to be ruined after so much work, right? Now whats missing is the pupil on the eyes. Again, take your match and dunk it in the black polish bottle. Slowly put two black dots in the middle of the white circles. They have to be smaller than the white ones, or your owl will look somewhat freaky :)


Once you're done, apply a layer of topcoat and let it dry. Then remove all the spare polish and there you go! A cute little owl nail art :) Here are some other examples of how you could do them:


This were actually the first ones i did. They turned out a lot better, but i forgot to take pictures for the tutorial, so i had to do them once again.


Or you could vary it and put little penguins :) It was really cold here so that just popped into our heads :)


Hope that tutorial helped you and we'd be glad to hear some feedback!
xoxo
the nerd.